


News
Huawei Mate 9 Teardown
Date: 02-01-2018 Click: 4080Step 1 Huawei Mate 9 Teardown

What's in the aluminum body of the Mate 9?
HiSilicon Kirin 960 SoC with an octa-core Cortex-A73 CPU and the Mali-G71 (MP8) octa-core GPU
Dual OIS camera system with Leica lenses providing 20 MP and 12 MP with ƒ/2.2 aperture
The smallest display of the Mate series with a 5.9" IPS LCD and 1920 × 1080 resolution (373 ppi)
64 GB internal storage, expandable via microSD to 256 GB
4000 mAh battery
Step 2 Huawei Mate 9 Teardown
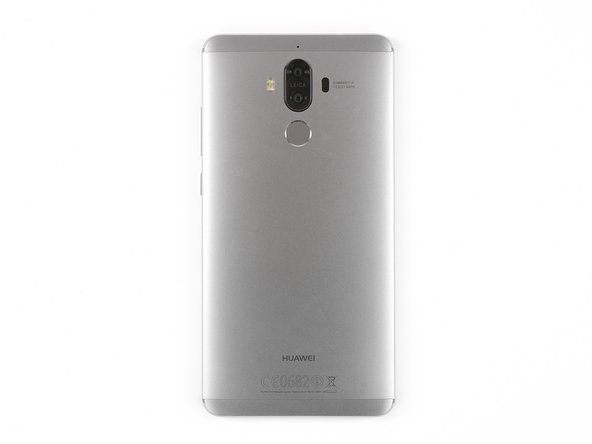
The cold, grey finish on our Huawei Mate 9 gives us chills as we start the teardown.
On the backside, we spy (or get spied by) the second-generation Leica Dual Camera. Huawei says that it "renders images in unprecedented detail." At the moment it's beating us in this little staring contest, but we'll have the last laugh when we dig it out for inspection.
The fingerprint sensor lives on the rear of the phablet, right below the camera. Huawei's lab tests say it's 20% faster when compared to the sensor on the Mate 8.
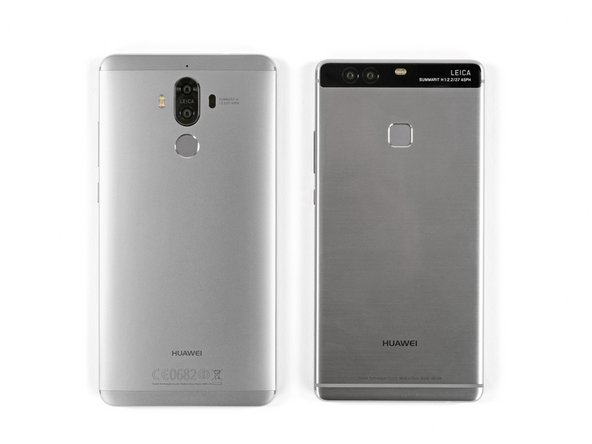
Before we commence with disassembly, we line up the Mate 9 next to its closest sibling, the Huawei 9 Plus—which is only slightly smaller, with 0.4 fewer inches on the display diagonal. We tend to prefer the more contoured (and modern looking?) back of the Mate 9.
Step 3

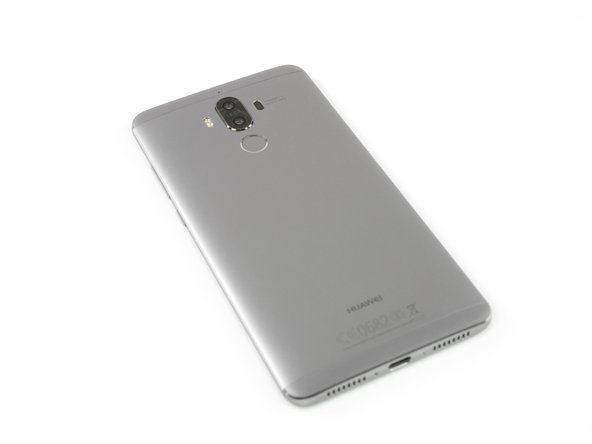
The first steps of the disassembly are rather unexciting, but give us a little more time to admire the sleek design of the Mate 9.
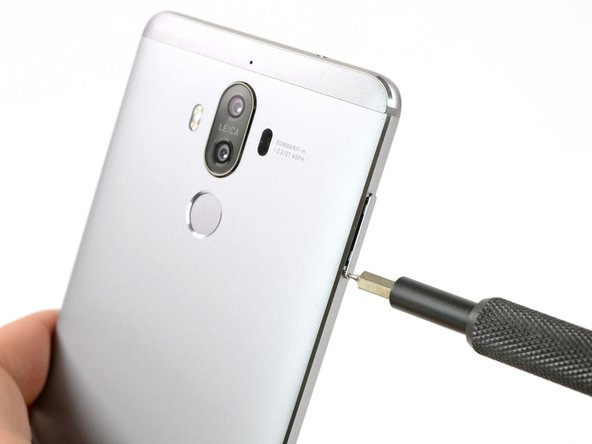
We remove the SIM and SD card tray—which (depending on your preference) can hold either a second nano SIM card, or one SIM and one SD card with up to 256 GB of additional storage.
The precious inner workings are protected by two seemingly Apple-esque pentalobe screws—only they're not, because they have six lobes each.
Time to open up, mate!
Step 4
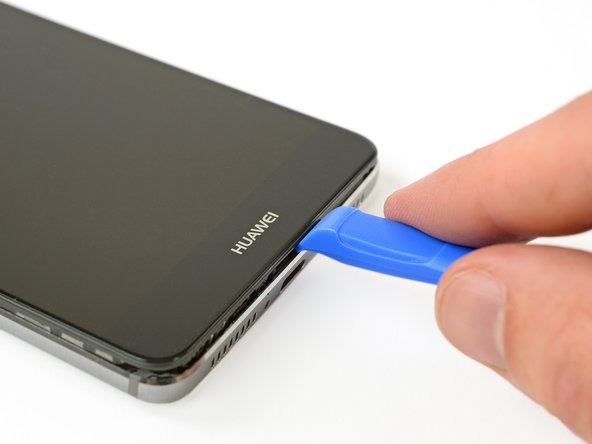

With the screws off, we take the biggest knife we can find an Opening Tool to pry open this phablet.
No other tools needed, and we're in … looks like the inside of a phone to us! There is one flex cable which still connects the back cover with the main assembly of the Mate 9.
This single flex cable is responsible for the flashlight, the fingerprint sensor, and the volume and power buttons! What a versatile beast!
Step 5
Before we can start with the removal of anything essential, we need to get rid of a bunch of Phillips #000 screws and a piece of black adhesive covering the flex cables.
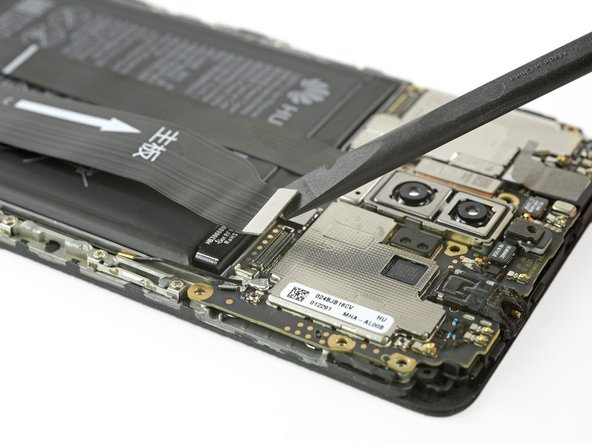
After we say goodbye to some metal brackets, we can start to expose the motherboard by unplugging the display and motherboard flex cable, battery cable, and the antenna cable.
Up to this point we feel like we're removing the battery of the Mate 9's sibling, the Huawei 9 Plus.
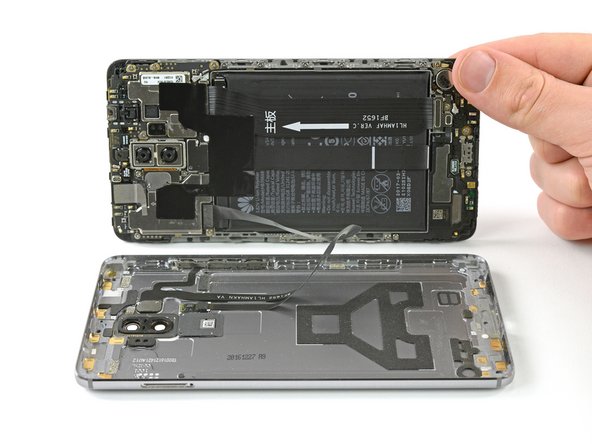
Step 6


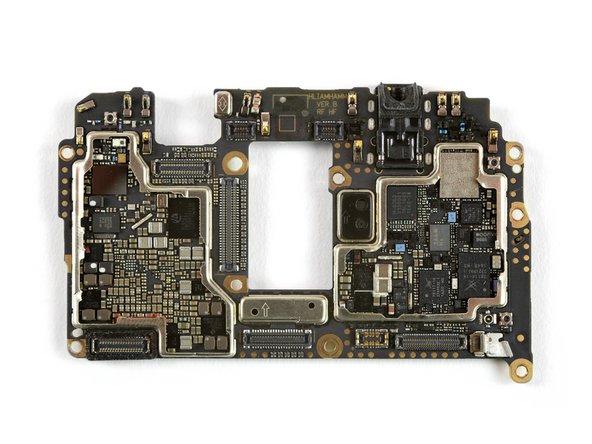
The motherboard removal is a piece of cake. Finally we can check out the chipset of the Mate 9!
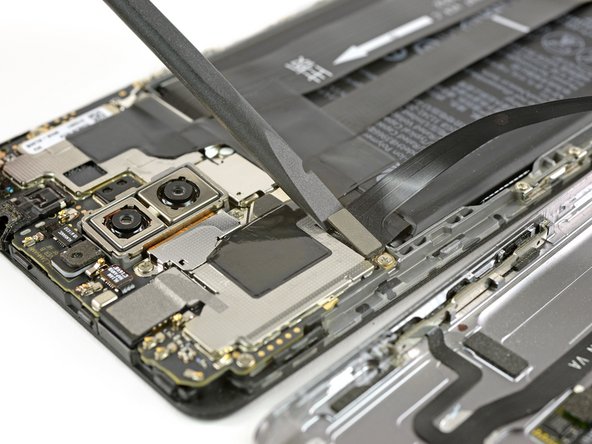
But before getting to the chips, we want to take a look at the Mate's two cameras (well, three to be exact)—starting with the 2nd generation Leica Dual Camera!
The camera is comprised of two single lenses: one with a 12 MP RGB sensor, and the other with a 20 MP monochrome sensor. The RGB sensor captures vivid colours, while the monochrome sensor picks out the finer details.
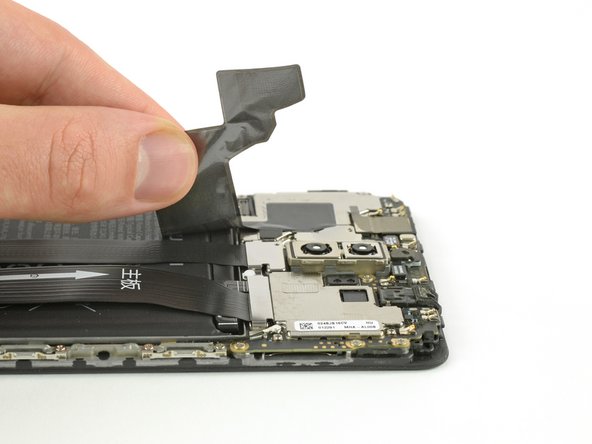
Step 7
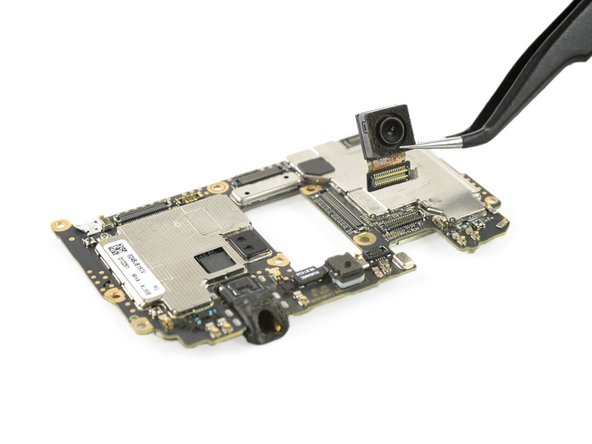
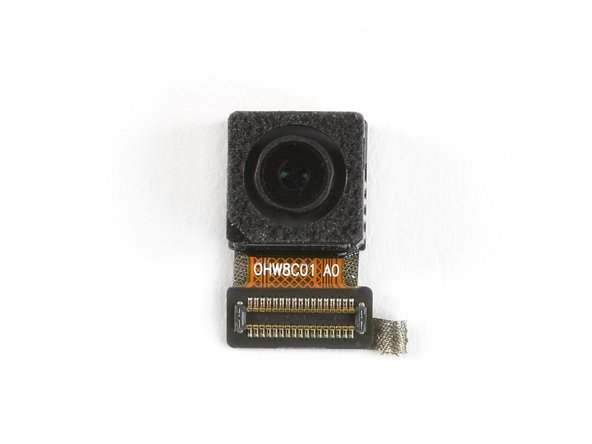
The front camera comes out next, after we free it from its little bit of adhesive. Time to point our camera at this camera so we can camera camera camera.
The Huawei Mate 9 uses an 8 MP selfie cam with autofocus and a range of features to help you take speedy selfies (in case you need to take a selfie while running to your bus).
Step 8

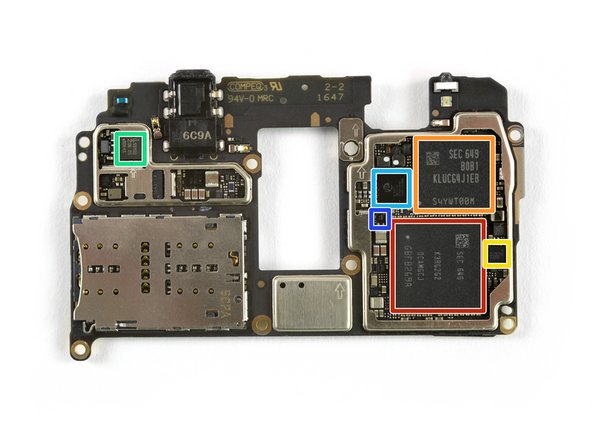
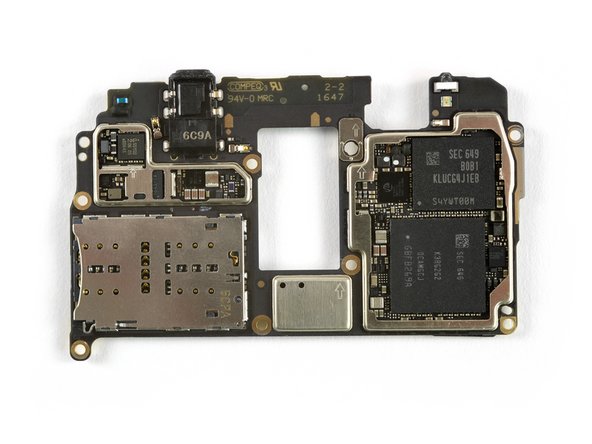
Headlights on! It's chip time!
Layered underneath the 4 GB of Samsung RAM lies a Kirin 960 octa-core CPU with a Mali-G71 GPU
64 GB of Samsung flash memory
ICM-20690 6-axis gyroscope and accelerometer
NXP PN64 NFC controller
HiSilicon Hi6403 audio codec
Maxim MAX98925EWEV audio amplifier
Step 9

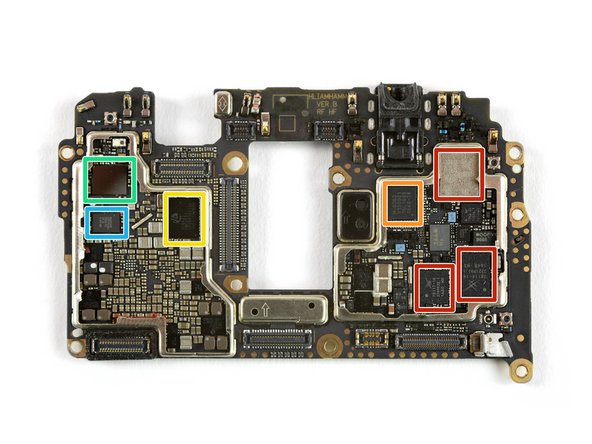
And on the back side:
Skyworks SKY78113-1, SKY78117-14 and SKY78114-14 for WCDMA / LTE bands
HiSilicon Hi6362 RF receiver
HiSilicon Hi6421 power manager IC
Broadcom BCM4774IBG2G location hub chip
Broadcom BCM43455XKUBG 5G WiFi/BT module
Step 10

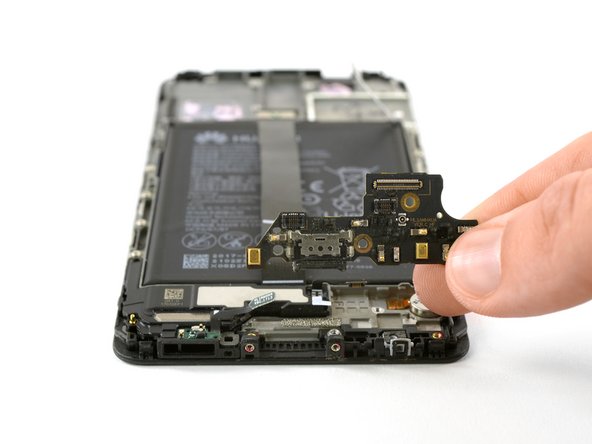
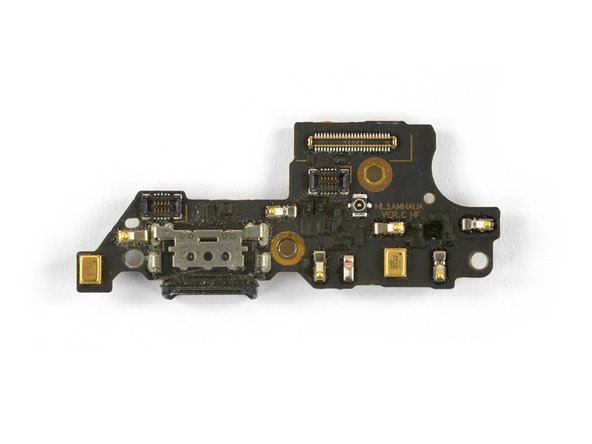
After peering into the heart of the Mate 9, we calm down a little and proceed with the more mundane removal of the motherboard flex cable and some connectors.
A daughterboard falls into our hands, and with tears in our eyes, we see—the USB-C port is soldered to it.
Nevertheless, this port is responsible for fully charging the Mate 9 in 90 minutes. Pretty nifty, as long as you don't wear it out.
Step 11

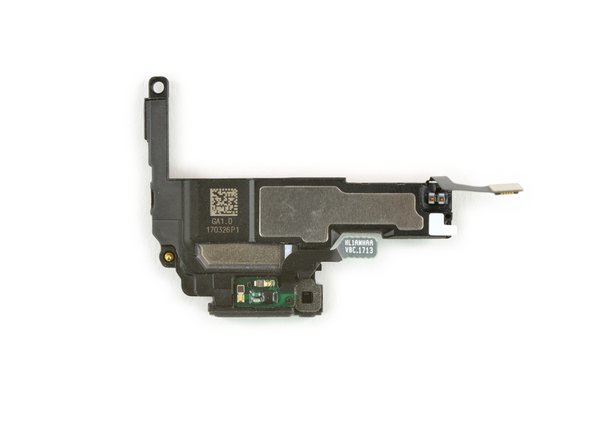
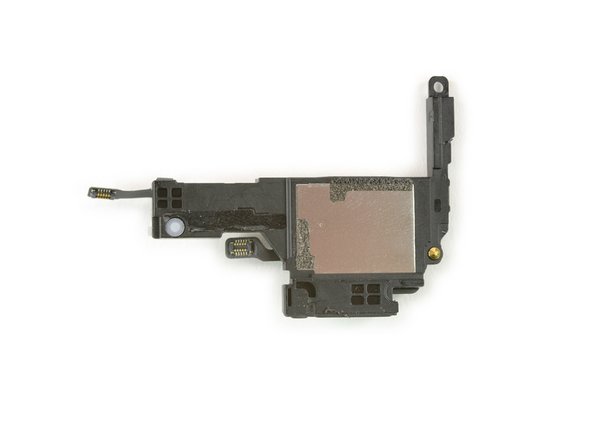
Today's teardown tip is: don't stop 'til you get enough loudspeaker. This one supports the earpiece speaker in the display for a full audiovisual experience—when it's not on the teardown table, anyway.
Although there's a 3.5 mm headphone jack on board—something that's rarer and rarer these days—its audio quality doesn't seem to be so good here. Meanwhile, weird things happen when you rotate your phone!
Step 12

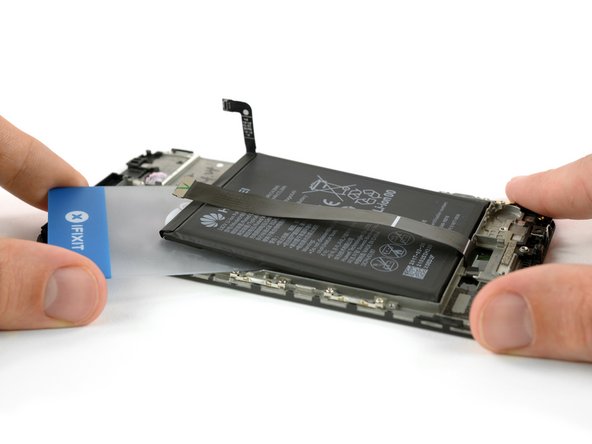
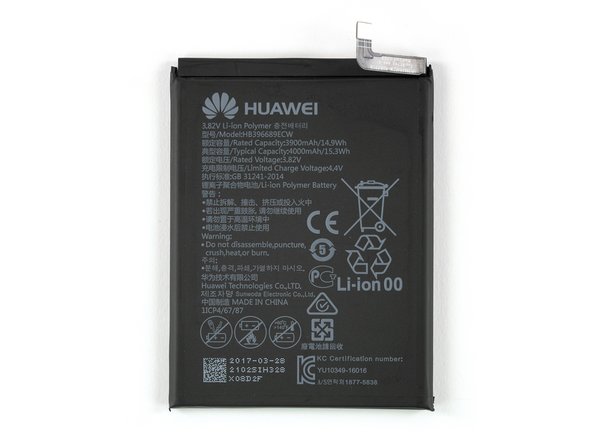
As we examine the battery our heart beats a little bit faster for a second, as we only see a single adhesive strip we need to pull out...
....Well we've been pleased too early. Right under the battery is a big, mean piece of adhesive we need to combat. Luckily our Plastic Cards come in handy!
Now that the battery is out, we can compare it to its competitors! Fully topped off, this 3.82 V, 4000 mAh cell will deliver up to 15.3 Wh of power. The new iPhone 8 Plus has only 10.28 Wh.
Huawei claims a power user will experience a full day of battery, and that you'll get two days out of a charge if you use the phone less regularly.
Step 13
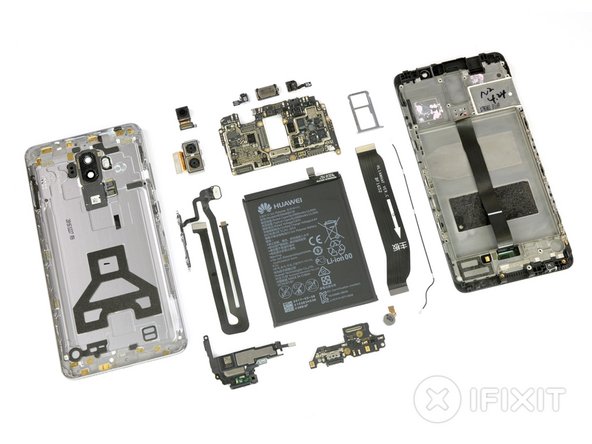
With the primary components laid out for inspection, we're calling this teardown a success.
We tried somewhat less successfully to separate the display from the frame. This procedure is nothing to look forward to, so better not crack the glass.
All info from: https://www.ifixit.com/Teardown/Huawei+Mate+9+Teardown/98335#s184246
